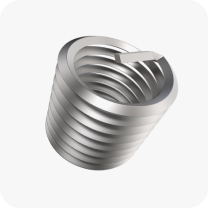
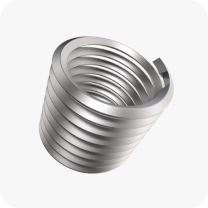
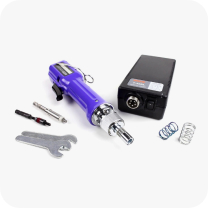
Prewind and pre-winder are terms commonly used with helical coil insert installation tools, and they are applicable to both tanged and Tangless® inserts. To prewind an insert is essentially to reduce the insert diameter so that it will install easily into the tapped hole. The pre-winder is the internally threaded portion of the installation tool. In addition to reducing the diameter of the insert, the pre-winder also keeps every coil of the insert in the required lead and pitch, again for ease of entry into the tapped hole.
Some installation tools do not have pre-winders. These tools utilise a threaded mandrel. (Some insert companies use plain, unthreaded mandrels for their repair kit tools. The threaded mandrel tools without pre-winders work best with coarse (UNC) thread inserts. UNC inserts have a coarser or heavier wire cross section relative to the diameter. This makes the inserts stiffer, or less flexible, thus, they are easier to install than fine thread (UNF) inserts. The fine thread inserts tend to “flop around” on the mandrel and that is why pre-winding is recommended.
How does the pre-winder work? The rotating threaded mandrel picks up the tang (or the notch on Tangless® inserts) and drives the insert into the pre-winder. The first thread of the pre-winder is convoluted to give the insert an abrupt start, and prevent the insert from cross threading. The torque applied by the mandrel, coupled with the resistance of the insert passing through the pre-winder reduces the insert diameter. As the insert exits the pre-winder and enters the tapped hole, it is prewound and in perfect lead and pitch to facilitate a smooth installation.
Once the insert is installed, and the mandrel rotation is reversed, the insert coils spring outward, anchoring the insert in the tapped hole. On air tools, the pre-winder also has a rear thread. A critical part of the manufacturing process is that the front and rear threads of the pre-winder have to be tapped simultaneously, exactly ½ pitch out of lead with each other. If this is not done perfectly, the inserts will bind in the pre-winder.
Metric inserts tend to be finer than their equivalent inch diameter size. Therefore, prewinding is recommended for most metric sizes. A good example is the M3 x 0.5 size, which compares in diameter to the 4-40 UNC size.
However, the M3 x 0.5 size has a pitch of about 51 threads per inch, as compared with the 4-40 size which is 40 threads per inch. The M3 size is much finer, and is extremely difficult to install without using a prewinder type of tool.
Designing the mandrel on an installation tool is a very precise process. The mandrel must be large enough in diameter to hold the insert in position, yet the diameter must be small enough to clear the locking coil on locking type inserts. This prerequisite combined with the finer wire cross sections, necessitated that KATO UK’s engineers design a separate tool for free-running and locking metric Tangless® inserts. The UNC and UNF sizes did not require separate mandrels for free-running and locking.




.jpg?width=352&name=Weighing%20medical%20components%202%20(1).jpg)
.jpg?width=352&name=KATO%20PLANE%20(1).jpg)
